 Merken
 There's something about green cookies that makes people smile before they even taste them. My neighbor knocked on the door one March afternoon with flour still in her hair, asking if I had gel food coloring because her daughter's class was doing a St. Patrick's Day potluck the next morning. We ended up making these together in my kitchen, and watching her face light up when the dough turned that perfect shamrock green made the whole thing feel like magic. Now every year, someone asks me to bring them to the party.
I remember my daughter biting into her first sandwich cookie and getting green sugar all over her nose, then demanding to know if she could have another one immediately. She was six, and that moment taught me that festive food doesn't have to be complicated to create a memory—sometimes it just needs to be a little bit sparkly and taste like butter and vanilla.
Ingredients
- All-purpose flour (2 1/2 cups): The foundation of these cookies, and sifting it with the leavening agents prevents dense pockets from forming in your dough.
- Baking powder (1/2 tsp): Just enough to give these cookies a gentle lift without making them cake-like or too cakey.
- Salt (1/4 tsp): This tiny amount enhances the sweetness and deepens the vanilla flavor in ways you'll taste but not consciously notice.
- Unsalted butter (1 cup), softened: Room temperature butter creams with sugar more effectively, and using unsalted lets you control the salt level completely.
- Granulated sugar (1 cup): This creates the tender crumb and slight crispness at the edges that makes these cookies so satisfying.
- Large egg (1): Acts as a binder and adds moisture without overwhelming the dough with extra liquid.
- Pure vanilla extract (2 tsp): Use real vanilla—the flavor difference in the frosting is worth it, and that's where it really shines through.
- Almond extract (1/2 tsp, optional): A whisper of almond adds depth and prevents the cookies from tasting one-dimensionally sweet.
- Green gel food coloring: Gel coloring gives you that vibrant green without adding water that would make your dough wet and sticky.
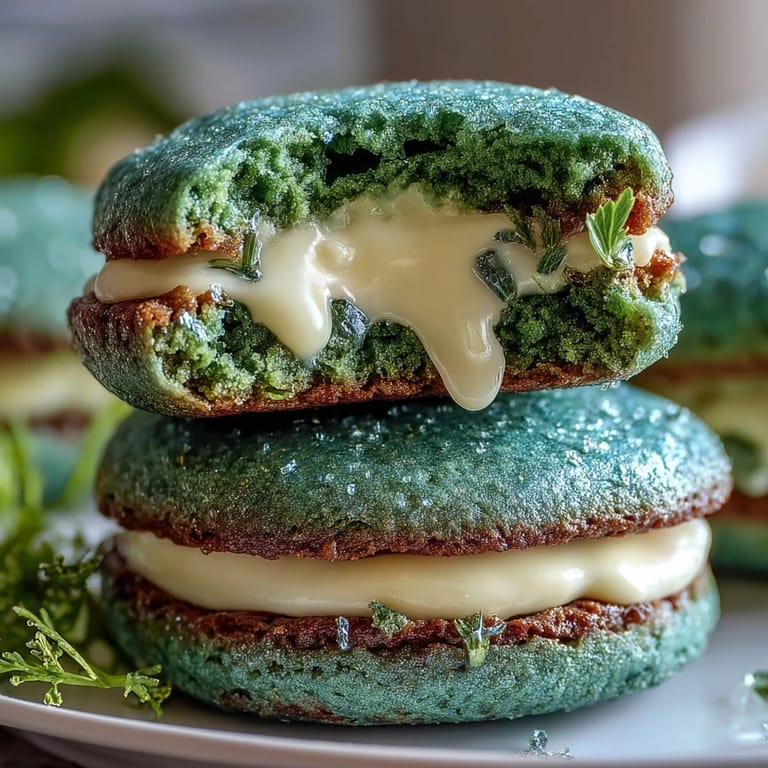
- Green sparkling sugar (1/2 cup): This is what catches the light and makes people reach for the cookies first.
- Unsalted butter for frosting (1/2 cup), softened: Cold butter won't blend smoothly, so pull it out of the fridge about an hour before you start.
- Powdered sugar (1 3/4 cups), sifted: Sifting removes lumps and gives you frosting that's silky instead of gritty.
- Milk (1 1/2 tbsp): This thins the frosting just enough to spread or pipe easily without breaking down the structure.
- Pure vanilla extract for frosting (1 tsp): This is where vanilla flavor becomes the star of the show.
- Salt pinch: A tiny amount balances the sweetness and makes the frosting taste less one-note.
Tired of Takeout? 🥡
Get 10 meals you can make faster than delivery arrives. Seriously.
One email. No spam. Unsubscribe anytime.
Instructions
- Heat your oven and prep:
- Set the oven to 350°F and line two baking sheets with parchment paper. This takes two minutes but saves you from scrambling later when your butter is creamed and ready to go.
- Mix your dry base:
- Whisk flour, baking powder, and salt together in a medium bowl and set it aside. This combines the leavening throughout so you don't end up with random pockets of baking powder.
- Cream butter and sugar:
- In a large bowl, beat softened butter and granulated sugar together for 2 to 3 minutes until the mixture is pale, fluffy, and noticeably lighter in color and texture. Listen for the mixer to ease up a bit—that's when you know enough air has been incorporated.
- Add your wet ingredients:
- Beat in the egg, vanilla extract, and almond extract if you're using it. The mixture will look a bit separated at first, but keep mixing until it comes together into something smooth and creamy.
- Color your dough green:
- Add a few drops of green gel food coloring and mix until you reach the shade you want. Start with less and add more gradually so you don't overshoot into a shade that's too intense.
- Bring dough together:
- Gradually fold or mix in the dry ingredients until a soft dough forms and no flour streaks remain. Don't overmix once the flour is incorporated, or your cookies will be tough.
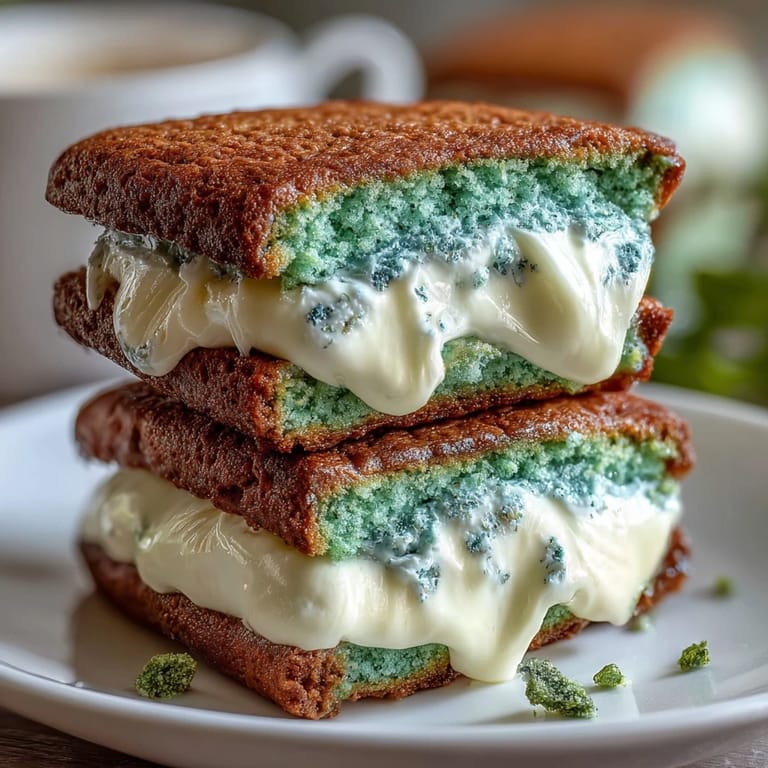
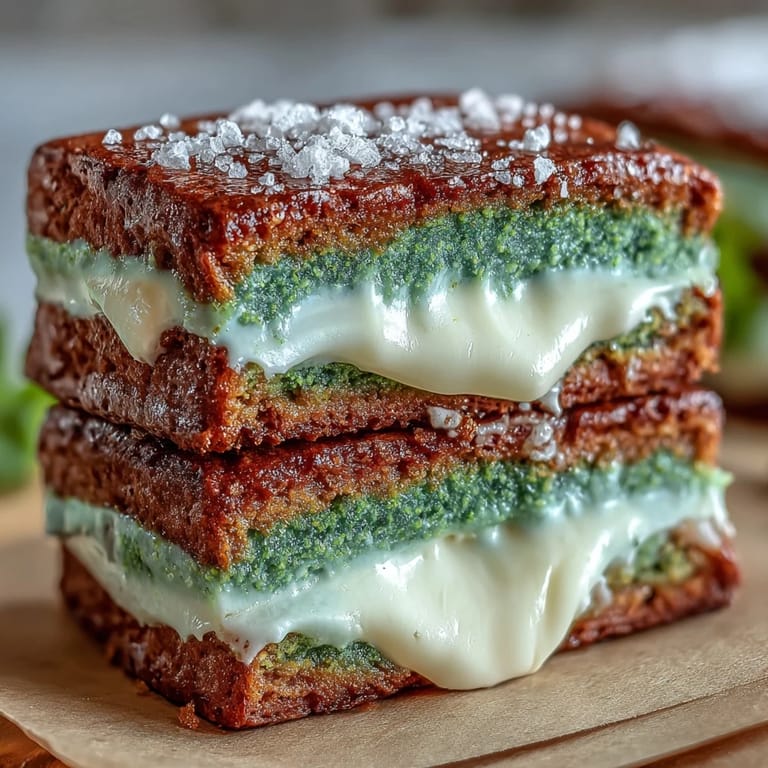
- Shape and coat with sparkle:
- Scoop dough into tablespoon-sized portions, roll each into a ball, and immediately roll it in the green sparkling sugar until it's completely coated. The sugar adheres better to slightly warm dough.
- Place and flatten:
- Arrange the sugar-coated balls 2 inches apart on your prepared baking sheets. Gently press each one down with your palm until it's about 1/2 inch thick—they'll look like thick discs, not completely flat cookies.
- Bake until perfect:
- Bake for 9 to 11 minutes until the edges are set but the centers still have a tiny bit of give when you touch them gently. The cookies firm up more as they cool, so don't overbake or they'll be hard instead of chewy.
- Cool completely:
- Transfer the baked cookies to a wire rack and let them cool all the way to room temperature before filling them. Warm cookies will melt the frosting and make assembly a mess.
- Make the frosting:
- In a medium bowl, beat softened butter until it's creamy and pale, then add powdered sugar, milk, vanilla, and a pinch of salt. Beat until the frosting is smooth, fluffy, and spreadable.
- Assemble your sandwiches:
- Spread or pipe a generous layer of frosting onto the flat side of half your cooled cookies. Top each with another cookie, flat side down, pressing gently to create a sandwich, then roll the exposed frosting around the edges in more sparkling sugar for extra glamour.
 Merken
 One year my son's teacher sent home a photo of the cookie plate from the classroom party, and these were completely gone while the other treats were still half-full. That moment reminded me that simple, festive, and made-with-care tastes like home, no matter what occasion brought you to make them.
Why Gel Food Coloring Changes Everything
I learned the hard way after using liquid food coloring and ending up with dough that spread everywhere and baked into flat discs instead of cookies. Gel coloring gives you that brilliant, almost glowing green without thinning out your dough or throwing off the texture. It's one of those small ingredient swaps that seems minor until you're cleaning up a baking sheet of cookie puddle.
The Frosting Temperature Game
Cold butter from the fridge will never blend smoothly with powdered sugar, no matter how long you beat it. Letting your butter soften at room temperature for an hour beforehand means the frosting comes together creamy and light instead of grainy and lumpy. I used to skip this step thinking I was saving time, then I'd spend extra time trying to fix grainy frosting that couldn't be fixed.
Storage and Make-Ahead Magic
These cookies stay soft in an airtight container at room temperature for up to three days, which means you can bake them the day before a party and fill them the morning of. The dough also freezes beautifully for up to two weeks, so you can keep unbaked dough balls on hand for whenever the craving hits. Here's what I've learned works best:
- Store unfilled baked cookies in one container and frosting in another to keep them from getting soggy.
- If you make them ahead, let them sit together for a couple of hours before serving so the flavors meld slightly.
- Transport them in a single layer in a wide shallow container rather than stacking them, or the frosting will get smashed.
 Merken
 These cookies taste like celebration, and they're forgiving enough to make with anyone—kids, friends, or solo on a quiet afternoon when you just want something green and sparkly on your counter. Once you've made them once, they become your go-to festive treat.
Rezept FAQ
- → Wie bekomme ich die Plätzchen besonders grün?
Verwende lebensmittelechte grüne Gel-Farbe, um einen intensiven Farbton ohne Verdünnung des Teigs zu erzielen.
- → Kann ich die Vanillefüllung variieren?
Ja, durch Zugabe von etwas Pfefferminzextrakt erhält die Creme eine frische Note, die hervorragend zum Fest passt.
- → Wie backe ich die Kekse am besten?
Backe sie bei 175°C (350°F) für 9–11 Minuten, bis die Ränder fest sind, die Mitte aber noch weich bleibt.
- → Wie bewahre ich die Sandwiches auf?
In einem luftdichten Behälter bei Raumtemperatur bleiben sie bis zu drei Tage frisch und weich.
- → Kann ich das Mandelaroma weglassen?
Ja, das Mandelaroma ist optional und kann je nach Geschmack ignoriert werden.